A birthday card is possibly the most common card you will send and make. Everyone has a birthday and everyone likes to receive a birthday card so it’s not surprise if you find yourself making a lot of them! And really that’s a good thing. It’s touching to receive a card for your birthday, whatever your age, and one that’s been handmade by someone close to you is always lovely. So, it’s a lovely thing to do and you’re probably going to be making quite a few of them! But what if you’re struggling with what to do? Your creativity is at a low, you’re out of ideas, you’ve used up all the good ones. These are all problems card makers face. We’ll try to give you a hand and some help with a few birthday card ideas to get those creative juices flowing.
Click on any of the birthday card images to see them larger.

This card is fairly simple to make.
- Begin by cutting 2 strips of pink and pastel papers the same height as your card with a width of 3-5cm.
- This is optional but you can rub the pink paper on a white pigment pad to get that ridged type look.
- Cut one side of each bits of paper using decorative edged scissors so that the strips are narrower than the straight sided strips.
- Glue the straight edges bits to each side of the card. Thus should leave you with a central area of white card still showing through.
- Next glue the decorative edged strips over the strips you’ve just glued down ensuring the decorative cut edges faces inwards.
- You’ll need a “Make a Wish” card embellishment or really any embellishment you want for the central area. Stick this down.
- Finish it off by adding the “Many Happy Returns” and “Birthday Boy/Girl” above and below your embellishment. Again though you can use any choice of words or embellishments you like.
- And that’s it!

This tutorial we found on Pinterest is very easy to do and doesn’t require too much skill.
You will need a fairy or cupcake case, a small wax candles from something like a birthday cake, a bit of ribbon and some paper in your choice of colours. You just have to cut the cake case, cut your paper into a rough crescent shape, glue them and your candle down onto the card. Write the letters for wish (missing out the “I”) and glue down the layers pieces of paper for the flame and that’s it! Couldn’t be simpler.
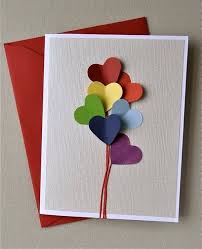
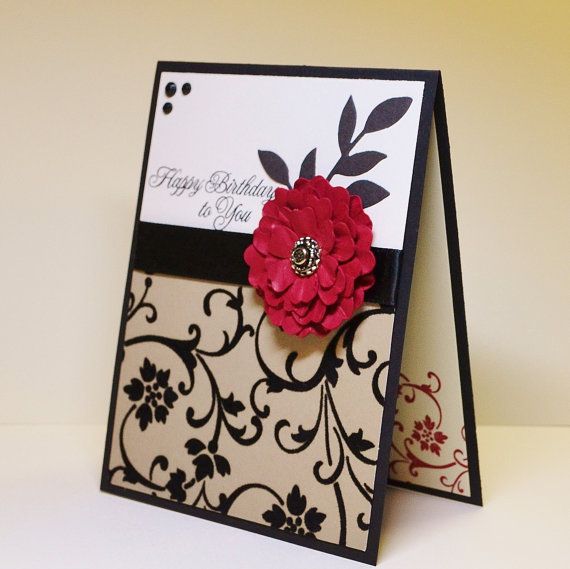
This is quite an understated birthday card but is very elegant and sweet. If you wanted you could add extra embellishments yourself. Making it is fairly easy to do. Take your cardstock, cut some paper of your choice to slightly smaller than the card size. Glue that on. Attach some bits of ribbon for the balloon string then glue down the heart shaped balloons you’ve cut out (fold them in the middle first to get the raised effect). And if you did want to add those embellishments or peel offs then you can do so.

This is another simple birthday card idea. It’s just all peel offs. You can buy these in most craft shops and all you do is remove them from their backing and stick them down. It may sound basic but can create a very beautiful look as you can see.

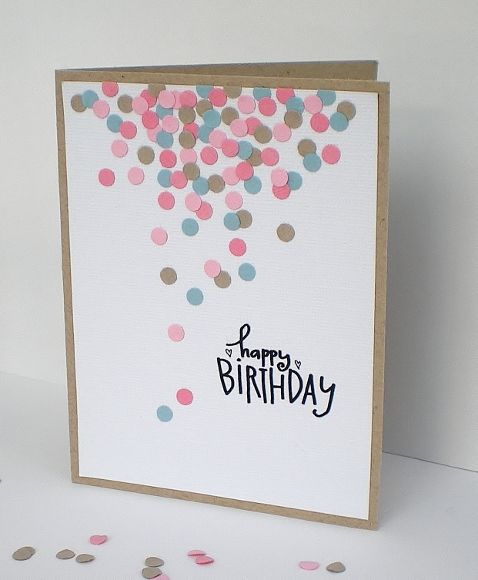
This one may look a bit more complicated but it’s still not too tricky. As always you’ll need your card, some choice of paper for the backing to the “Happy”, plain white paper, some string or ribbon and your choice of pens for writing.
Cut your plain paper into circles and write the letters for “Happy” on each one. Then cut 5 small rectangles of card or paper and cut out the small v-shape of each as you can see in the card image above. Glue those down to your card and then the circles on top of each one. Take your ribbon or string and arrange it as above or however you like. Then glue it on. Finally either write “Birthday” with your choice of pen or use a peel off. Done!
You can copy these ideas and do them yourself or you can use them as inspiration to create your own magic birthday cards! Be brave and let your imagination run wild!
More Handmade Birthday Card Ideas